
Choose instructions:

How to Sourdough

How to Ciabatta
Choose instructions:
How to Sourdough
How to Ciabatta
How to make
Sourdough
with
Milly’s
Follow along with our step-by-step photo guide or video tutorial.
Follow the instructions! Please do NOT make any changes!
These instructions are proven to work for Milly's.
How to make
Sourdough
with
Milly’s
Follow along with our step-by-step
photo guide or video tutorial.
Follow the instructions! Please do NOT make any changes! These instructions are proven to work for Milly's.
Photo Guide:


Follow the instructions please do NOT make any changes. These instructions are proven to work for Milly's
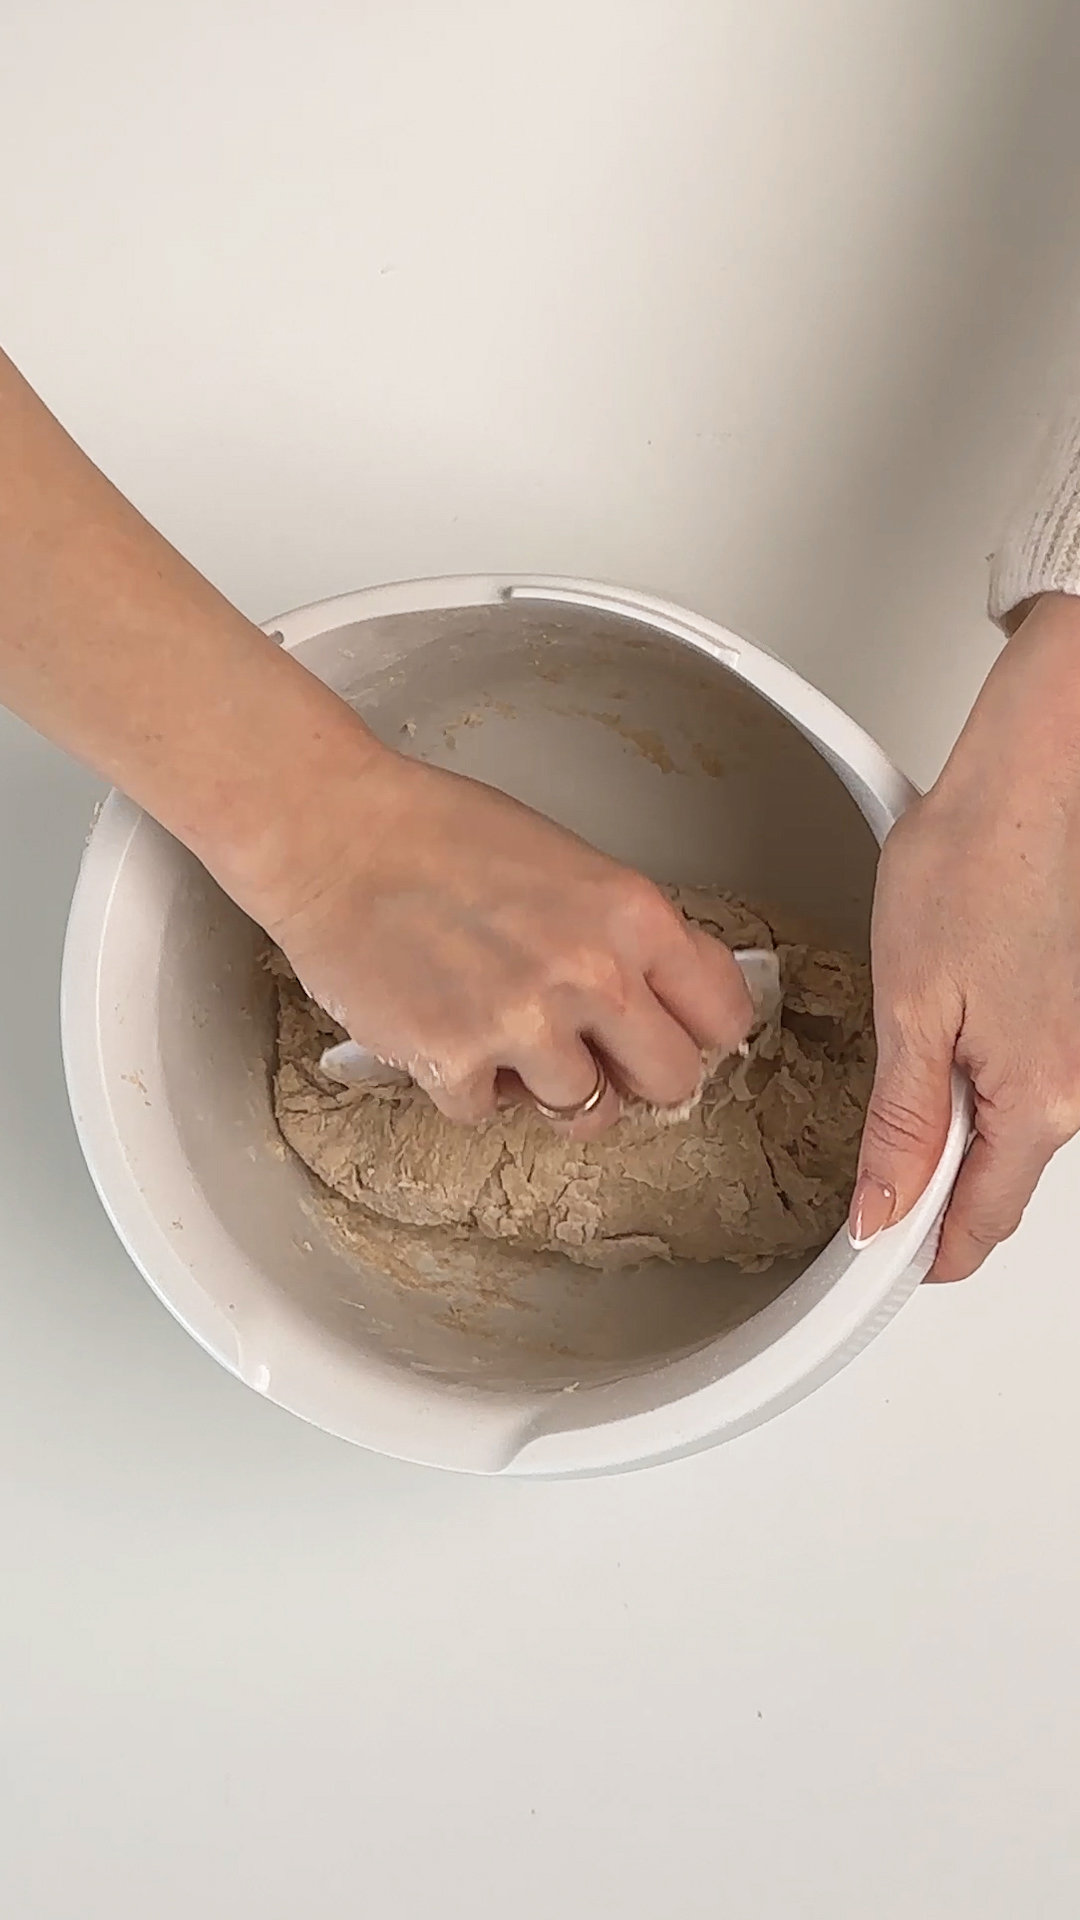
Step 1: Mix and Knead
How to knead by hand
STEP 1: MIX & KNEAD
You need:
- Milly's Sourdough Baking Mix
- 1.5 cups = 350ml = lukewarm water from a bottle (use CORRECT amount of water)
PRO TIP: For extra sour flavor, add 1-2 tbsp. of apple cider vinegar to the water before mixing.
Kneading for 8-10 min
BY MACHINE:
Use middle speed or use dough program
or
BY HAND:
Mix 1-2 min with scraper or spoon. Knead and stretch & slap & fold energetically
Info by hand: Really knead & stretch for 8 min straight, the gluten NEEDS this time to get strengthened. It's a crucial part and the more you streeeeeeetch & knead - the better.
Info by hand: Really knead & stretch for 8 min straight, the gluten NEEDS this time to get strengthened.
It´s a crucial part and the more you streeeeeeetch & knead - the better.
Note: The dough is sticky! That is absolutely fine, don't worry ;) just keep going.
How to knead by hand
STEP 2: REST & FERMENTATION
Choose ONE of the two methods below:
OPTION 1: Quick Rise
Time: 2 hours
Temperature: Room Temperature (70-80°F)
Where: Leave on counter covered with plastic foil
Next: Bake immediately after rise
OPTION 2: Cold Ferment
Time: 3-18 hours
Best: 8-14 hours
Temperature: Refrigerate at 43-47°F
Where: In fridge covered with plastic foil
Next: Can bake directly from fridge or let come to room temp
EITHER have it on the counter and bake immediately OR have it in the fridge without any rise on the counter. Do NOT combine.
EITHER have it on the counter and bake immediately OR have it
in the fridge without any rise on the counter. Do NOT combine.
Milly's Info: The dough ferments while resting. It creates good bacteria, breaks down FODMAPs
and ATIs and develops a wonderful flavor. Best flavor results are after 8-14h of fermentation.
Milly's Info: The dough ferments while resting. It creates good bacteria, breaks down FODMAPs and ATIs and develops a wonderful flavor. Best flavor results are after 8-14h of fermentation.
STEP 3: SHAPE & PREHEAT
DOUGH CHECK: Your dough should have doubled in size. If not, let rest for +30 min at room temperature.
SHAPING
Watch the shape technique video below this section. Important for tension - but do NOT overwork.
1. Wet your hands (to avoid sticking)
2. Separate dough gently and lift from bowl to working surface
3. Shape dough: Grind/shape round (super important!)
4. Let rest at room temp while oven preheats
PREHEATING OVEN
Mode: bottom + top heat
Temperature: 480°F
Time: 30-45 minutes
IMPORTANT: Place equipment IN oven while preheating (preheat together!)
Equipment (choose one):
OPTION A:
Dutch Oven with lid
OPTION B:
Baking tray on upper level + oven-proof bowl or pot on second tray on lower level
Don't forget: Equipment goes in too! Your dutch oven or baking trays and bowl should preheat together with the oven.
Shaping after rest: MUST watch shaping tutorial
EITHER have it on the counter and bake immediately OR have it
in the fridge without any rise on the counter. Do NOT combine.
Milly's Tip: The dough ferments while resting. It creates good bacteria, breaks down FODMAPs
and ATIs and develops a wonderful flavor. Best flavor results are after 8-14h of fermentation.
COMMON SHAPING MISTAKES TO AVOID
Learn from these fails to get it right:

Not round shaped. The surface is not smooth, not closed.
The bottom is not closed, that´s why it sticky and open.
→ roll & grind for 10-30 sec

Round and "closed" at bottom but the surface isn´t smooth and closed on sides
→ roll & grind for 10-30 sec

No round and smooth shape.
Not closed at bottom.
No surface tension.
→ roll & grind for 10-30 sec
How to prepare the oven
STEP 3: SHAPE & PREHEAT
SHAPING
Watch the shape technique video below this section. Important for tension - but do NOT overwork.
1. Wet your hands (to avoid sticking)
2. Separate dough gently and lift from bowl to working surface
3. Shape dough: Grind/shape round (super important!)
4. Let rest at room temp while oven preheats
PREHEATING OVEN
Mode: bottom + top heat
Temperature: 480°F
Time: 30-45 minutes
IMPORTANT: Place equipment IN oven while preheating (preheat together!)
Equipment (choose one):
OPTION A:
Dutch Oven with lid
OPTION B:
Baking tray on upper level + oven-proof bowl or pot on second tray on lower level
DOUGH CHECK: Your dough should have doubled in size. If not, let rest for +30 min at room temperature.
Don't forget: Equipment goes in too! Your dutch oven or baking trays and bowl should preheat together with the oven.
Shaping after rest: MUST watch shaping tutorial
EITHER have it on the counter and bake immediately OR have it
in the fridge without any rise on the counter. Do NOT combine.
Milly's Tip: The dough ferments while resting. It creates good bacteria, breaks down FODMAPs
and ATIs and develops a wonderful flavor. Best flavor results are after 8-14h of fermentation.
COMMON SHAPING MISTAKES TO AVOID
Learn from these fails to get it right:
Not round shaped. The surface is not smooth, not closed.
The bottom is not closed, that´s why it sticky and open.
→ roll & grind for 10-30 sec
Round and "closed" at bottom but the surface isn´t smooth and closed on sides
→ roll & grind for 10-30 sec
No round and smooth shape.
Not closed at bottom.
No surface tension.
→ roll & grind for 10-30 sec
How to prepare the oven
STEP 4: SCORE & BAKE
FINAL PREP BEFORE BAKING
Wet your hands (to avoid sticking) and then grind/shape round one last time for about 5-10 seconds
Select the method that matches your equipment:
WITH DUTCH OVEN
1. Prepare:
Put dough on parchment paper (or floured dutch oven)
2. Score:
Score deeply with sharp knife or lame
Watch the scoring video below this section.
3. Bake:
Close lid and place in preheated oven
WITHOUT (Baking Trays & Bowl)
1. Prepare:
Boil 2 cups of water and place dough on parchment paper (or floured baking tray)
2. Score:
Score deeply with sharp knife or lame
Watch the scoring video below this section.
3. Steam & Bake:
Place on middle/lower level and add boiling water to bowl on upper baking tray (OR use oven-proof bowl over dough if no upper tray)
Watch the baking tray & bowl video (below the scoring video).
BAKING SCHEDULE
Bake at 480°F for 20 min.
Lower to 410°F and bake
25-30 min - light crust
30-40 min - dark crust
After baking: let cool out for 1h on wire
Milly's Tip: Every oven is different, so it's good to watch out for crust color
Doneness Check: Check doneness by knocking on the bread's bottom - if it sounds hollow, it's done!
If not, bake +5 min and check again (ovens vary).
Doneness Check: Check doneness by knocking on the bread's bottom - if it sounds hollow, it's done! If not, bake +5 min and check again (ovens vary).
Doneness Check: Check doneness by knocking on the bread's bottom - if it sounds hollow, it's done! If not, bake +5 min and check again (ovens vary).
How to score in
EITHER have it on the counter and bake immediately OR have it
in the fridge without any rise on the counter. Do NOT combine.
Milly's Tip: The dough ferments while resting. It creates good bacteria, breaks down FODMAPs
and ATIs and develops a wonderful flavor. Best flavor results are after 8-14h of fermentation.
Baking Tray & Bowl (if no dutch oven)
STORAGE & SERVING TIPS
Storing
Best Storage: In bread box or cover open cut with plastic wrap to keep moist
Optional: Slice & freeze for longer storage
Serving
- Always let cool 1h on a rack before slicing
- Use a serrated knife for clean cuts
Milly's Tip: To soften hard bread put the loaf under running water for 1-3 seconds and bake 10-15 min at 360°F

EITHER have it on the counter and bake immediately OR have it
in the fridge without any rise on the counter. Do NOT combine.
Milly's Tip: The dough ferments while resting. It creates good bacteria, breaks down FODMAPs
and ATIs and develops a wonderful flavor. Best flavor results are after 8-14h of fermentation.
How to make
Sourdough
with
Milly’s
Follow along with our step-by-step photo guide or video tutorial.
Follow the instructions! Please do NOT make any changes!
These instructions are proven to work for Milly's.
How to make
Sourdough
with
Milly’s
Follow along with our step-by-step
photo guide or video tutorial.
Follow the instructions! Please do NOT make any changes! These instructions are proven to work for Milly's.
Photo Guide:
STORAGE & SERVING TIPS
Storing
Best Storage: In bread box or cover open cut with plastic wrap to keep moist
Optional: Slice & freeze for longer storage
Serving
- Always let cool 1h on a rack before slicing
- Use a serrated knife for clean cuts
Milly's Tip: To soften hard bread put the loaf under running water for 1-3 seconds and bake 10-15 min at 360°F
EITHER have it on the counter and bake immediately OR have it
in the fridge without any rise on the counter. Do NOT combine.
Milly's Tip: The dough ferments while resting. It creates good bacteria, breaks down FODMAPs
and ATIs and develops a wonderful flavor. Best flavor results are after 8-14h of fermentation.

